送信用メールサーバ構築【Ubuntu×Postfix×Gmail】
2024年1月にあった「ネット出願にGmailが使えないトラブル」は、インフラエンジニアとして明日は我が身の事件だと思ったことを記憶しています。
しかし、メールに関わる技術は複雑で、メールのソフトウェア、ネットワーク、ドメイン、認証などが組み合わさっているため単純ではありません。
しかし、今さらメールサーバを構築する機会も少ないです。あるとすれば、アプリ用の送信専用メールサーバではないでしょうか。
今回は、Postfixを利用して、送信用メールサーバ構築をしていきます。
メールサーバ構築
0. 前提条件
今回のハンズオンの前提条件は以下の通りです。
・実行環境
OS:Ubuntu 22.04/24.04 LTS
ネットワーク:インターネットへ出られること。ポート587/TCPの外向き通信が許可されていること
・GmailリレーのためGmailアカウント作成済み
・送信テストの宛先は自身のGmailなど、受信が確実なアドレスを用意。
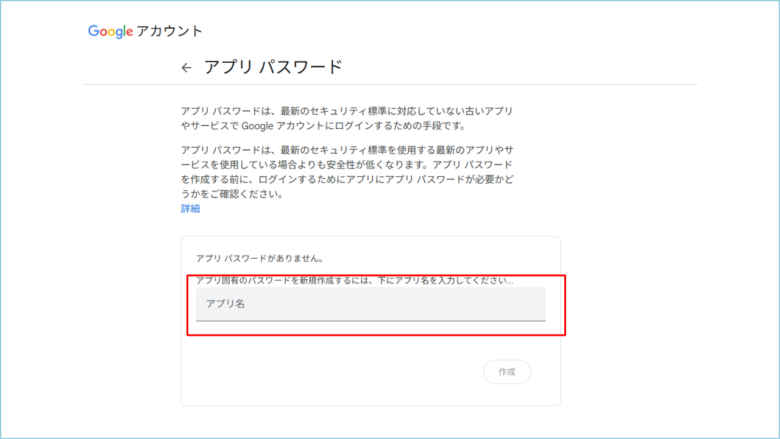
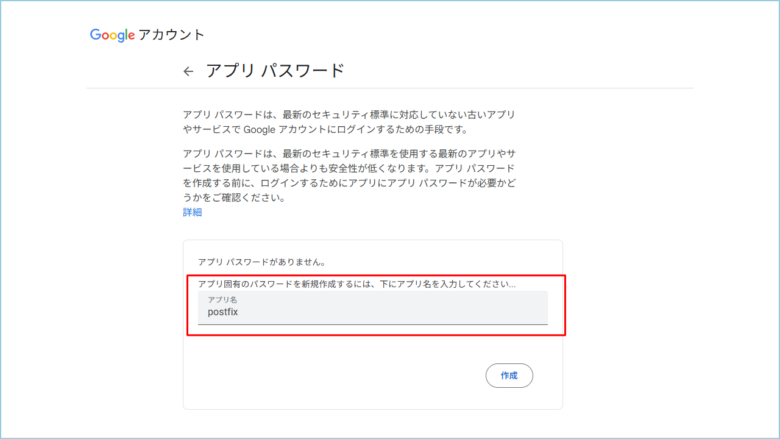
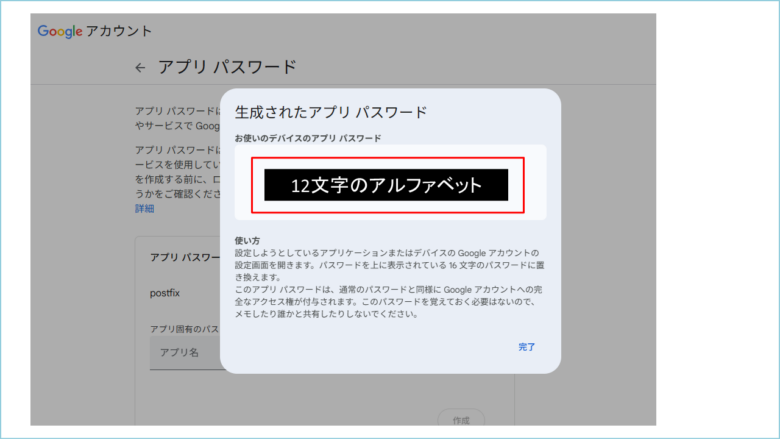
1. アプリパスワード取得
Gmailにはメールサーバーの機能があり、今回送信専用のメールサーバーを構築するために利用します、メールサーバーとしての機能を利用するためには、アプリケーションパスワードの発行が必要になります。以下のURLにアクセスし、取得しましょう。
https://myaccount.google.com/apppasswords
↓
↓
2. パッケージインストール
サーバに接続し、以下のコマンドを実行します。
sudo apt update
sudo apt install -y postfix
【実行結果】
ubuntu@ip-10-0-1-206:~$ sudo apt install -y postfix
Reading package lists... Done
Building dependency tree... Done
Reading state information... Done
The following additional packages will be installed:
  libnsl2 ssl-cert
Suggested packages:
  mail-reader postfix-cdb postfix-doc postfix-ldap postfix-lmdb postfix-mta-sts-resolver postfix-mysql postfix-pcre postfix-pgsql postfix-sqlite procmail sasl2-bin
  | dovecot-common
The following NEW packages will be installed:
  libnsl2 postfix ssl-cert
0 upgraded, 3 newly installed, 0 to remove and 0 not upgraded.
Need to get 1313 kB of archives.
After this operation, 4389 kB of additional disk space will be used.
Get:1 http://ap-southeast-1.ec2.archive.ubuntu.com/ubuntu noble/main amd64 ssl-cert all 1.1.2ubuntu1 [17.8 kB]
Get:2 http://ap-southeast-1.ec2.archive.ubuntu.com/ubuntu noble/main amd64 libnsl2 amd64 1.3.0-3build3 [41.4 kB]
Get:3 http://ap-southeast-1.ec2.archive.ubuntu.com/ubuntu noble/main amd64 postfix amd64 3.8.6-1build2 [1254 kB]
Fetched 1313 kB in 4s (374 kB/s)
Preconfiguring packages ...
Selecting previously unselected package ssl-cert.
(Reading database ... 70683 files and directories currently installed.)
Preparing to unpack .../ssl-cert_1.1.2ubuntu1_all.deb ...
Unpacking ssl-cert (1.1.2ubuntu1) ...
Selecting previously unselected package libnsl2:amd64.
Preparing to unpack .../libnsl2_1.3.0-3build3_amd64.deb ...
Unpacking libnsl2:amd64 (1.3.0-3build3) ...
Selecting previously unselected package postfix.
Preparing to unpack .../postfix_3.8.6-1build2_amd64.deb ...
Unpacking postfix (3.8.6-1build2) ...
Setting up ssl-cert (1.1.2ubuntu1) ...
Created symlink /etc/systemd/system/multi-user.target.wants/ssl-cert.service → /usr/lib/systemd/system/ssl-cert.service.
Setting up libnsl2:amd64 (1.3.0-3build3) ...
Setting up postfix (3.8.6-1build2) ...
info: Selecting GID from range 100 to 999 ...
info: Adding group `postfix' (GID 114) ...
info: Selecting UID from range 100 to 999 ...

info: Adding system user `postfix' (UID 111) ...
info: Adding new user `postfix' (UID 111) with group `postfix' ...
info: Not creating home directory `/var/spool/postfix'.
Creating /etc/postfix/dynamicmaps.cf
info: Selecting GID from range 100 to 999 ...
info: Adding group `postdrop' (GID 115) ...
setting myhostname: ip-10-0-1-206.ap-southeast-1.compute.internal
setting alias maps
setting alias database
changing /etc/mailname to ip-10-0-1-206.ap-southeast-1.compute.internal
setting myorigin
setting destinations: $myhostname, ip-10-0-1-206.ap-southeast-1.compute.internal, localhost.ap-southeast-1.compute.internal, localhost
setting relayhost: [smtp.gmail.com]:587
setting mynetworks: 127.0.0.0/8 [::ffff:127.0.0.0]/104 [::1]/128
setting mailbox_size_limit: 0
setting recipient_delimiter: +
setting inet_interfaces: all
setting inet_protocols: all
/etc/aliases does not exist, creating it.
WARNING: /etc/aliases exists, but does not have a root alias.

Postfix (main.cf) is now set up with a default configuration.  If you need to
make changes, edit /etc/postfix/main.cf (and others) as needed.  To view
Postfix configuration values, see postconf(1).

After modifying main.cf, be sure to run 'systemctl reload postfix'.

Running newaliases
Created symlink /etc/systemd/system/multi-user.target.wants/postfix.service → /usr/lib/systemd/system/postfix.service.
Processing triggers for rsyslog (8.2312.0-3ubuntu9.1) ...
Processing triggers for ufw (0.36.2-6) ...
Processing triggers for man-db (2.12.0-4build2) ...
Processing triggers for libc-bin (2.39-0ubuntu8.4) ...
Scanning processes...
Scanning linux images...

Running kernel seems to be up-to-date.

No services need to be restarted.

No containers need to be restarted.

No user sessions are running outdated binaries.

No VM guests are running outdated hypervisor (qemu) binaries on this host.
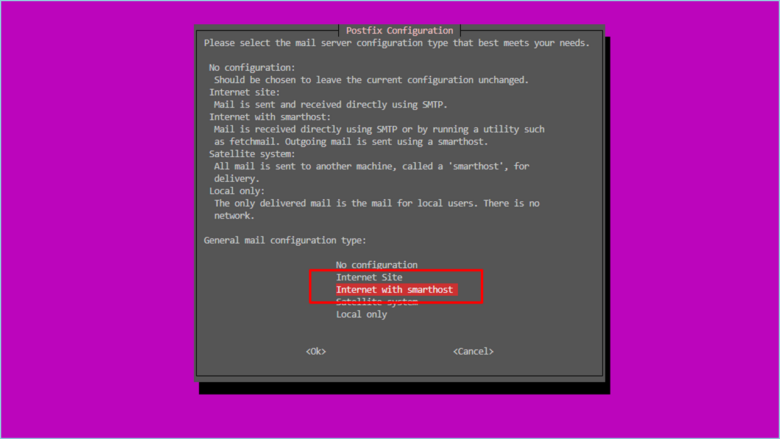
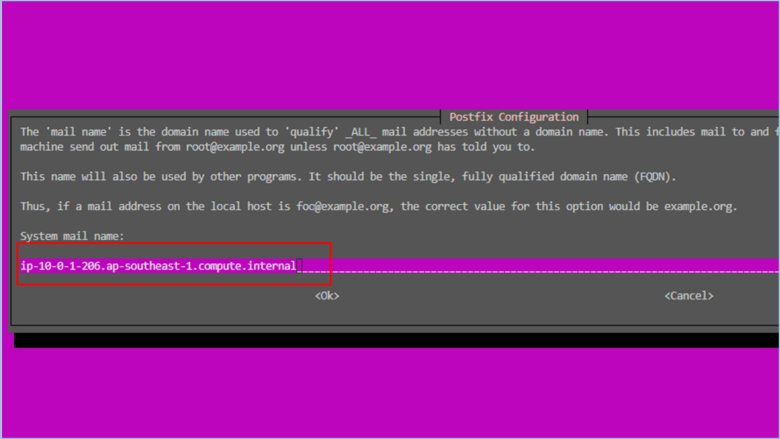
インストールの途中で、GUIでの設定があります。
↓メールの送信を代わりにしてくれる[ Internet with smarthost ]を選択します。
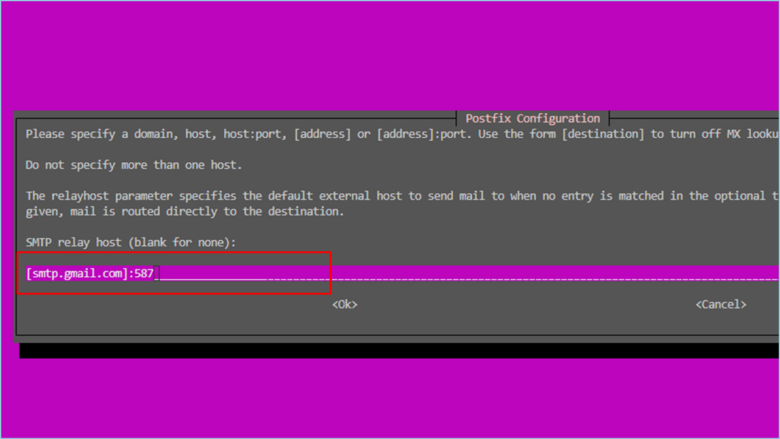
↓[ System mail name ]には、「 [smtp.gmail.com]:587 」と入力します。
↓
インストールは以上で完了です。
3. 設定ファイル編集
Gmailのサーバを使用するための認証情報を設定します。
sudo vi /etc/postfix/sasl_passwd
以下の内容を貼り付けて、[:wq]で保存・終了します。
[smtp.gmail.com]:587 <Gmailのメールアドレス>:<アプリケーションパスワード>例:[smtp.gmail.com]:587 xxxxxxxxxxxxxx@gmail.com:abcdefghijklmnop
Postfixで利用するための検索テーブルに変換し、パーミッションを変更後に不要なファイルを削除します。
sudo postmap /etc/postfix/sasl_passwd
sudo chmod 600 /etc/postfix/sasl_passwd.db
sudo rm /etc/postfix/sasl_passwd
認証関連の設定を行います。
sudo postconf -e 'smtp_use_tls = yes'
sudo postconf -e 'smtp_sasl_password_maps = hash:/etc/postfix/sasl_passwd'
sudo postconf -e 'smtp_sasl_mechanism_filter = plain'
sudo postconf -e 'smtp_sasl_tls_security_options = noanonymous'
sudo postconf -e 'smtp_sasl_auth_enable = yes'
sudo systemctl restart postfix.service
設定ファイル編集は以上です。
4. 動作確認
メールクライアントをインストールします。
sudo apt install -y mailutils
メールを送信してみましょう。※宛先は自身が管理するメールアドレスにしておきましょう。
echo '<メール本文>' | mail -s "<メール件名>" <宛先メールアドレス>
宛先のメールクライアントソフトで受信できたか確認してみると、
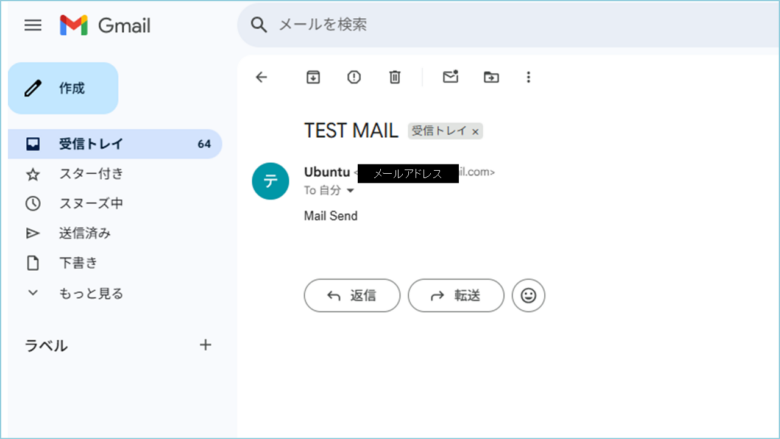
無事にメールが送信されたようです。
まとめ
いまさらメールサーバなんて必要なのか?と思う方もいるかと思いますが、メールの送信のみでいうと、Webアプリから通知などに有用です。
いざメールサーバを構築しようとすると、OP25Bや認証情報の設定につまづくはずです。わたし自身かなり調査し、この手順にたどり着きました。
ぜひ試してみてください。